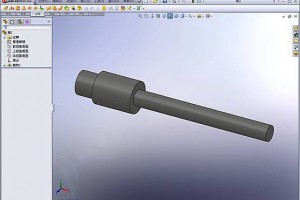
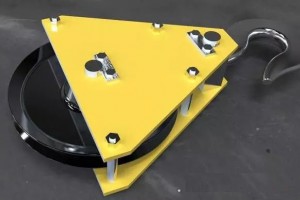
在本章中,我们将创建一个简单的装配,步骤是这样的:
1.创建另一个零件
2.建立装配文件
3.在装配中加入零件
4.指定装配中的贴合约束,将两个零件装配到一起,如下图:

§3.1 创建基础特征
我们利用在第二章中学习的方法来建立一个新零件,并且建立第一个特征。为了使您对第二章的内容有更深刻的认识,我们会尽量把创建新零件的过程说的详细些。
●点击nclick="if(this.width>screen.width-461) window.open(" height=28 src="http://www.zmozx.com/static/image/lazy.gif" class="lazy" original="http://www.iforchina.com/picup/030/050613193620224.gif" width=29 onload="if(this.width>screen.width-460)this.width=screen.width-460;" border=0 http: www.iforchina.com picup 030 050613193620224.gif?);?>,选择零件,建立一个新的零件文件;
●新开一个草绘nclick="if(this.width>screen.width-461) window.open(" height=31 src="http://www.zmozx.com/static/image/lazy.gif" class="lazy" original="http://www.iforchina.com/picup/030/050613193620226.gif" width=37 onload="if(this.width>screen.width-460)this.width=screen.width-460;" border=0 http: www.iforchina.com picup 030 050613193620226.gif?);?>,在坐标原点上,绘出一个矩形;
●标注矩形nclick="if(this.width>screen.width-461) window.open(" height=30 src="http://www.zmozx.com/static/image/lazy.gif" class="lazy" original="http://www.iforchina.com/picup/030/050613193620225.gif" width=32 onload="if(this.width>screen.width-460)this.width=screen.width-460;" border=0 http: www.iforchina.com picup 030 050613193620225.gif?);?>尺寸为120mmX120mm
●点击拉伸工具 nclick="if(this.width>screen.width-461) window.open(" height=35 src="http://www.zmozx.com/static/image/lazy.gif" class="lazy" original="http://www.iforchina.com/picup/030/050613193620221.gif" width=38 onload="if(this.width>screen.width-460)this.width=screen.width-460;" border=0 http: www.iforchina.com picup 030 050613193620221.gif?);?>,延伸该矩形,使之成为一个实体特征,并采用延伸到终点条件为给定高度,给定高度为90mm;

●使用圆角工具 nclick="if(this.width>screen.width-461) window.open(" height=33 src="http://www.zmozx.com/static/image/lazy.gif" class="lazy" original="http://www.iforchina.com/picup/030/050613193620222.gif" width=35 onload="if(this.width>screen.width-460)this.width=screen.width-460;" border=0 http: www.iforchina.com picup 030 050613193620222.gif?);?>,给四个边做一个半径为10mm的圆角;

●使用抽壳nclick="if(this.width>screen.width-461) window.open(" height=34 src="http://www.zmozx.com/static/image/lazy.gif" class="lazy" original="http://www.iforchina.com/picup/030/050613193620223.gif" width=37 onload="if(this.width>screen.width-460)this.width=screen.width-460;" border=0 http: www.iforchina.com picup 030 050613193620223.gif?);?>,移去零件的前面,并使抽壳厚度为4mm;

●命名文件为tutor2,并保存(Solidworks自动为零件添加后缀:SLDPRT)
§3.2 使用选择过滤器
选择过滤器,可以让你很容易地从图形中选择你希望选择的物体,按下F5,或点击nclick="if(this.width>screen.width-461) window.open(" height=30 src="http://www.zmozx.com/static/image/lazy.gif" class="lazy" original="http://www.iforchina.com/picup/030/050613193776715.gif" width=33 onload="if(this.width>screen.width-460)this.width=screen.width-460;" border=0 http: www.iforchina.com picup 030 050613193776715.gif?);?>,即可以显示选择过滤器工具条
nclick="if(this.width>screen.width-461) window.open(" height=32 src="http://www.zmozx.com/static/image/lazy.gif" class="lazy" original="http://www.iforchina.com/picup/030/050613193776716.gif" width=443 onload="if(this.width>screen.width-460)this.width=screen.width-460;" border=0 http: www.iforchina.com picup 030 050613193776716.gif?);?>
前4个按钮可以指定选取过滤器的动作。
nclick="if(this.width>screen.width-461) window.open(" height=28 src="http://www.zmozx.com/static/image/lazy.gif" class="lazy" original="http://www.iforchina.com/picup/031/05061513581275.gif" width=28 onload="if(this.width>screen.width-460)this.width=screen.width-460;" border=0 http: www.iforchina.com picup 031 05061513581275.gif?);?>打开选取过滤器 ,置于窗口顶部(注意:在solidworks2000中,已经取消了本按钮)
nclick="if(this.width>screen.width-461) window.open(" height=26 src="http://www.zmozx.com/static/image/lazy.gif" class="lazy" original="http://www.iforchina.com/picup/030/050613193776712.gif" width=26 onload="if(this.width>screen.width-460)this.width=screen.width-460;" border=0 http: www.iforchina.com picup 030 050613193776712.gif?);?>打开或关闭选择过滤器
nclick="if(this.width>screen.width-461) window.open(" height=30 src="http://www.zmozx.com/static/image/lazy.gif" class="lazy" original="http://www.iforchina.com/picup/030/050613193776711.gif" width=27 onload="if(this.width>screen.width-460)this.width=screen.width-460;" border=0 http: www.iforchina.com picup 030 050613193776711.gif?);?>清除所有过滤器选项
nclick="if(this.width>screen.width-461) window.open(" height=24 src="http://www.zmozx.com/static/image/lazy.gif" class="lazy" original="http://www.iforchina.com/picup/031/05061513587745.gif" width=27 onload="if(this.width>screen.width-460)this.width=screen.width-460;" border=0 http: www.iforchina.com picup 031 05061513587745.gif?);?>选取所有当前功能使用的过滤器
其余的按钮是过滤器,可以在绘图区选择你需要的过滤器
如何使用过滤器
注意: 需要提醒的是,当过滤器被激活时,选择光标上有一小过滤器的标记,说明现在处于过滤状态,究竟过滤的是什么,你可要注意过滤工具条的选项吆。
●点击nclick="if(this.width>screen.width-461) window.open(" height=30 src="http://www.zmozx.com/static/image/lazy.gif" class="lazy" original="http://www.iforchina.com/picup/030/050613193776711.gif" width=27 onload="if(this.width>screen.width-460)this.width=screen.width-460;" border=0 http: www.iforchina.com picup 030 050613193776711.gif?);?>,取消所有过滤器选项,选取一过滤功能,(如尺寸工具或圆角特征), 然后点击"所有过滤",这样就可以使用过滤器了。可以通过点击任一个不需要的过滤器来取消这种选定。
●选取一功能,可以选择需要的过滤器,对该功能失效的过滤器将变成灰色,表示失效。
技巧提示:当使用完一个过滤后,应该使用nclick="if(this.width>screen.width-461) window.open(" height=30 src="http://www.zmozx.com/static/image/lazy.gif" class="lazy" original="http://www.iforchina.com/picup/030/050613193776711.gif" width=27 onload="if(this.width>screen.width-460)this.width=screen.width-460;" border=0 http: www.iforchina.com picup 030 050613193776711.gif?);?>关闭该过滤器,否则,在你进行下一个选择时,有可能你会受到限制。
关于使用过滤器的详细方法,请参见《用户手册》
§3.3 给零件建立切边
在本节中,可以利用实体转换工具nclick="if(this.width>screen.width-461) window.open(" height=22 src="http://www.zmozx.com/static/image/lazy.gif" class="lazy" original="http://www.iforchina.com/picup/030/050613193885592.gif" width=24 onload="if(this.width>screen.width-460)this.width=screen.width-460;" border=0 http: www.iforchina.com picup 030 050613193885592.gif?);?>和等距实体工具
nclick="if(this.width>screen.width-461) window.open(" height=23 src="http://www.zmozx.com/static/image/lazy.gif" class="lazy" original="http://www.iforchina.com/picup/030/050613193885598.gif" width=24 onload="if(this.width>screen.width-460)this.width=screen.width-460;" border=0 http: www.iforchina.com picup 030 050613193885598.gif?);?>来创建草绘的几何体。然后,创建一个切边与第二章中我们建立的实体进行装配。
提示:在本节中,使用选择过滤工具将使工作变的更加轻松(见上一节:使用过滤)
1、将零件的一个角放大,选择零件前面的薄壁,并点击草绘工具nclick="if(this.width>screen.width-461) window.open(" height=31 src="http://www.zmozx.com/static/image/lazy.gif" class="lazy" original="http://www.iforchina.com/picup/030/050613193885593.gif" width=37 onload="if(this.width>screen.width-460)this.width=screen.width-460;" border=0 http: www.iforchina.com picup 030 050613193885593.gif?);?>,新开一个草绘。此时,所选面的边界就变亮了。

第二部图

2、在草绘工具工具栏中点击转换工具nclick="if(this.width>screen.width-461) window.open(" height=22 src="http://www.zmozx.com/static/image/lazy.gif" class="lazy" original="http://www.iforchina.com/picup/030/050613193885592.gif" width=24 onload="if(this.width>screen.width-460)this.width=screen.width-460;" border=0 http: www.iforchina.com picup 030 050613193885592.gif?);?>,所选表面的边缘就以线或圆弧的形式被投影(复制到)草绘面上。
3、再次点击零件前面。
4、点击等距实体nclick="if(this.width>screen.width-461) window.open(" height=23 src="http://www.zmozx.com/static/image/lazy.gif" class="lazy" original="http://www.iforchina.com/picup/030/050613193885598.gif" width=24 onload="if(this.width>screen.width-460)this.width=screen.width-460;" border=0 http: www.iforchina.com picup 030 050613193885598.gif?);?>,此时,出现等距实体对话框

5、设置等距量为2mm,显示向外偏置。注意偏置方向,如果方向不正确,选中"反向"标签
6、由于我们希望向内,因此选中"反向"标签
7、点击:"应用",此时,线将被添加到草绘面上,并且,向内偏置2mm,当轮廓尺寸发生变化时,该特征将同时发生变化。
8、点击nclick="if(this.width>screen.width-461) window.open(" height=32 src="http://www.zmozx.com/static/image/lazy.gif" class="lazy" original="http://www.iforchina.com/picup/030/050613193885591.gif" width=34 onload="if(this.width>screen.width-460)this.width=screen.width-460;" border=0 http: www.iforchina.com picup 030 050613193885591.gif?);?>,新建一个拉伸切除特征。在出现的对话框中,选择"给定深度",输入深度为30mm.点击"确定"。两组线之间的部分被切初,产生如图所示的切边

§3.4 改变零件颜色
我们可以改变一个零件或其中某个特征的颜色或外观,步骤如下:
1 改变零件的颜色:
在设计树中,选中零件名称,点击nclick="if(this.width>screen.width-461) window.open(" height=21 src="http://www.zmozx.com/static/image/lazy.gif" class="lazy" original="http://www.iforchina.com/picup/030/050613193810572.png" width=23 onload="if(this.width>screen.width-460)this.width=screen.width-460;" border=0 http: www.iforchina.com picup 030 050613193810572.png?);?>,出现 WINDOWS标准颜色编辑对话框。指定一种颜色,零件既变成指定的颜色。
2 改变零件中指定面的颜色:
选中一表面,点击nclick="if(this.width>screen.width-461) window.open(" height=21 src="http://www.zmozx.com/static/image/lazy.gif" class="lazy" original="http://www.iforchina.com/picup/030/050613193810572.png" width=23 onload="if(this.width>screen.width-460)this.width=screen.width-460;" border=0 http: www.iforchina.com picup 030 050613193810572.png?);?>,出现 WINDOWS标准颜色编辑对话框。指定一种颜色,表面既变成指定的颜色。
注意:以上两种操作,只有在着色模式状态(nclick="if(this.width>screen.width-461) window.open(" height=32 src="http://www.zmozx.com/static/image/lazy.gif" class="lazy" original="http://www.iforchina.com/picup/030/050613193810571.gif" width=34 onload="if(this.width>screen.width-460)this.width=screen.width-460;" border=0 http: www.iforchina.com picup 030 050613193810571.gif?);?>),才会看到效果。
§3.5 建立装配文件
现在可以利用以上的两个零件进行装配了。
1、如果零件:tutor1.sldprt还没有打开,现在打开它吧。
2、新建一个装配文件:文件-新建-装配
3、点击窗口-纵向平铺,使窗口平铺,将这三个文件平铺到桌面上。关闭不用的窗口
4、从tutor1.sldprt的特征管理树中,拖动其图标到装配文件的装配文件的管理器中(请一定要拖动到装配文件的管理器中)。注意:在拖动过程中,图标的形状nclick="if(this.width>screen.width-461) window.open(" height=21 src="http://www.zmozx.com/static/image/lazy.gif" class="lazy" original="http://www.iforchina.com/picup/031/050615140199261.gif" width=23 onload="if(this.width>screen.width-460)this.width=screen.width-460;" border=0 http: www.iforchina.com picup 031 050615140199261.gif?);?> 。用这种拖动的方法向装配中添加零件,会使装配自动按照三个默认平面装配零件
5、拖动TUTOR2零件到装配文件的图形窗口,注意:当拖动零件到图形窗口时,图标的形状: nclick="if(this.width>screen.width-461) window.open(" height=21 src="http://www.zmozx.com/static/image/lazy.gif" class="lazy" original="http://www.iforchina.com/picup/031/050615140199262.gif" width=26 onload="if(this.width>screen.width-460)this.width=screen.width-460;" border=0 http: www.iforchina.com picup 031 050615140199262.gif?);?>
注意两点:
●拖动到装配文件的管理器中,图标形状为 nclick="if(this.width>screen.width-461) window.open(" height=21 src="http://www.zmozx.com/static/image/lazy.gif" class="lazy" original="http://www.iforchina.com/picup/031/050615140199261.gif" width=23 onload="if(this.width>screen.width-460)this.width=screen.width-460;" border=0 http: www.iforchina.com picup 031 050615140199261.gif?);?> ,说明是使装配自动按照三个默认平面装配零件
●拖动文件到装配文件的窗口中,图标形状为nclick="if(this.width>screen.width-461) window.open(" height=21 src="http://www.zmozx.com/static/image/lazy.gif" class="lazy" original="http://www.iforchina.com/picup/031/050615140199262.gif" width=26 onload="if(this.width>screen.width-460)this.width=screen.width-460;" border=0 http: www.iforchina.com picup 031 050615140199262.gif?);?>,说明是使装配按前视图摆放
保存装配文件;TUTOR(系统将自动添加后缀:SLDASM)。
在保存装配或工程图文件时,系统往往会提示下面的对话框,一般点击"是"

1、最大化装配窗口,此时两个零件文件窗口被挡住
2、点击nclick="if(this.width>screen.width-461) window.open(" height=34 src="http://www.zmozx.com/static/image/lazy.gif" class="lazy" original="http://www.iforchina.com/picup/030/050613193987161.gif" width=34 onload="if(this.width>screen.width-460)this.width=screen.width-460;" border=0 http: www.iforchina.com picup 030 050613193987161.gif?);?>,使装配文件适应整个窗口。
3、如果装配中显示了零件尺寸,则可以右键单击注释文件夹,取消显示特征尺寸选项
§3.6 处理装配元件
向一个装配文件添加完零件后,该零件被认为是该装配的一个元件,你可以独立地或几个一起对他们进行移动、旋转等操作。
第一个被装配的元件按系统默认的方式被固定下来,在特征管理树中,该零件被添加的一个前缀(固定)。该零件不能被移动,除非首先更改为FLOAT(浮动)。在管理树或图形区域,右键单击该零件,选择FLOAT,该零件的前缀变成(-),表明该零件处于不固定状态。
本节中,我们学习如何移动或旋转零件。
1、选择TUTOR2零件
2、点击下列中的任一个:
nclick="if(this.width>screen.width-461) window.open(" height=24 src="http://www.zmozx.com/static/image/lazy.gif" class="lazy" original="http://www.iforchina.com/picup/030/050613194092024.gif" width=25 onload="if(this.width>screen.width-460)this.width=screen.width-460;" border=0 http: www.iforchina.com picup 030 050613194092024.gif?);?>元件移动 ,选择该功能,不必事先选择零件,点击后,可以移动任意非固定零件
nclick="if(this.width>screen.width-461) window.open(" height=35 src="http://www.zmozx.com/static/image/lazy.gif" class="lazy" original="http://www.iforchina.com/picup/030/050613194092026.gif" width=37 onload="if(this.width>screen.width-460)this.width=screen.width-460;" border=0 http: www.iforchina.com picup 030 050613194092026.gif?);?>沿中心点旋转 ,首先选择零件(必须是浮动的),然后点击该按钮。
nclick="if(this.width>screen.width-461) window.open(" height=22 src="http://www.zmozx.com/static/image/lazy.gif" class="lazy" original="http://www.iforchina.com/picup/030/050613194092025.gif" width=23 onload="if(this.width>screen.width-460)this.width=screen.width-460;" border=0 http: www.iforchina.com picup 030 050613194092025.gif?);?>沿中心线旋转 ,首先选择某零件(必须是浮动的),然后按住ctrl键选择轴线、边或草绘线的其中之一。如果此时看不见轴线,可以点击显示,轴线,或显示,临时轴然后点击该按钮
注意:本功能操作上,只有同时选择两个元素(零件和轴线、边等),该功能才能使用;如果只选择了一个零件,系统会提示错误信息。
3、按需要移动或旋转零件
4、按如下方法退出移动或旋转操作
●再次点击该工具
●点击其他工具
●点击 nclick="if(this.width>screen.width-461) window.open(" height=33 src="http://www.zmozx.com/static/image/lazy.gif" class="lazy" original="http://www.iforchina.com/picup/030/050613194092021.gif" width=37 onload="if(this.width>screen.width-460)this.width=screen.width-460;" border=0 http: www.iforchina.com picup 030 050613194092021.gif?);?>
●从右键菜单选择"选择"
为改变零件的视图方向,可以用视图方位工具,选择nclick="if(this.width>screen.width-461) window.open(" height=29 src="http://www.zmozx.com/static/image/lazy.gif" class="lazy" original="http://www.iforchina.com/picup/030/050613194092022.gif" width=32 onload="if(this.width>screen.width-460)this.width=screen.width-460;" border=0 http: www.iforchina.com picup 030 050613194092022.gif?);?>,或工具
nclick="if(this.width>screen.width-461) window.open(" height=32 src="http://www.zmozx.com/static/image/lazy.gif" class="lazy" original="http://www.iforchina.com/picup/030/050613194092023.gif" width=33 onload="if(this.width>screen.width-460)this.width=screen.width-460;" border=0 http: www.iforchina.com picup 030 050613194092023.gif?);?>
§3.7 零件的重合约束
本节中,我们为零件建立重合约束(MATE),使这两个零件对齐,并装配到一起。
1、在视图工具箱中点击 视图定位nclick="if(this.width>screen.width-461) window.open(" height=25 src="http://www.zmozx.com/static/image/lazy.gif" class="lazy" original="http://www.iforchina.com/picup/030/050613194180902.gif" width=26 onload="if(this.width>screen.width-460)this.width=screen.width-460;" border=0 http: www.iforchina.com picup 030 050613194180902.gif?);?>,或直接按空格键,, 然后双击*等轴测
2、在装配工具条中点击配合nclick="if(this.width>screen.width-461) window.open(" height=24 src="http://www.zmozx.com/static/image/lazy.gif" class="lazy" original="http://www.iforchina.com/picup/030/050613194180903.gif" width=26 onload="if(this.width>screen.width-460)this.width=screen.width-460;" border=0 http: www.iforchina.com picup 030 050613194180903.gif?);?>,此时会出现装配贴合对话框
3、

4、点击零件TUTOR1的顶边,然后,点击零件TUTOR2的切边的外边;在所选项目中出现待选择的边。
5、在配合类型,选择重合,在对齐条件中选择最近处
6、点击;预览,两零件被选择的边一致的贴合在一起。
7、点击应用
用这种方式定义的元件位置,并不是完整的,因为在特征管理器中,该零件前面有一个(-)前缀。在用"贴合"约束装配后,仍然存在轴向的旋转自由,因此,还必须加入另外的约束;
点击nclick="if(this.width>screen.width-461) window.open(" height=35 src="http://www.zmozx.com/static/image/lazy.gif" class="lazy" original="http://www.iforchina.com/picup/030/050613194180904.gif" width=35 onload="if(this.width>screen.width-460)this.width=screen.width-460;" border=0 http: www.iforchina.com picup 030 050613194180904.gif?);?> ,然后点击零件2(TUTOR2)。注意光标的形状
nclick="if(this.width>screen.width-461) window.open(" height=25 src="http://www.zmozx.com/static/image/lazy.gif" class="lazy" original="http://www.iforchina.com/picup/030/050613194180906.gif" width=26 onload="if(this.width>screen.width-460)this.width=screen.width-460;" border=0 http: www.iforchina.com picup 030 050613194180906.gif?);?>,将零件拖动到另一边。
选择零件2(tutor2),按住CTRL键,选择贴合边,并点击nclick="if(this.width>screen.width-461) window.open(" height=35 src="http://www.zmozx.com/static/image/lazy.gif" class="lazy" original="http://www.iforchina.com/picup/030/050613194180905.gif" width=37 onload="if(this.width>screen.width-460)this.width=screen.width-460;" border=0 http: www.iforchina.com picup 030 050613194180905.gif?);?>,就可以沿贴合边拖动该零件。

§3.8 加入其他贴合约束
1、选择其中一个零件的一个面,然后,按住CTRL键,并点击另一零件的相关的面。如图

2、在装配工具条中点击nclick="if(this.width>screen.width-461) window.open(" height=24 src="http://www.zmozx.com/static/image/lazy.gif" class="lazy" original="http://www.iforchina.com/picup/030/050613194126014.gif" width=26 onload="if(this.width>screen.width-460)this.width=screen.width-460;" border=0 http: www.iforchina.com picup 030 050613194126014.gif?);?>,
3、在装配贴合对话框中,再次选择重合以及最近处
4、点击;预览,两零件贴合形状如图。

5、点击应用
6、重复1~5步,按上图中的边选择。
7、保存装配。

用这种方式定义的元件位置,仍然不是完整的,因为在特征管理器中,该零件前面有一个(-)前缀。这是因为贴合好的零件仍然能够相对原点移动,可以加入如下约束:
1、点击nclick="if(this.width>screen.width-461) window.open(" height=35 src="http://www.zmozx.com/static/image/lazy.gif" class="lazy" original="http://www.iforchina.com/picup/030/050613194126015.gif" width=35 onload="if(this.width>screen.width-460)this.width=screen.width-460;" border=0 http: www.iforchina.com picup 030 050613194126015.gif?);?> ,然后点击其中一个零件。
2、拖动整个装配 (因为他们已经被贴合,所以可以一块移动)
3、在特征管理器中,右键点击任意零件,然后选择 固定,
被选中的零件的前缀变成了(固定),另一个零件的前缀没有了,这表明装配位置已经被完全固定了


 浙公网安备: 33028102000314号